Thursday, April 30, 2015

2001 Dodge Ram 2500 Brake Pad Installation Guide

2001 Dodge Ram 2500 Brake Pad Installation Guide

The 2001 Dodge Ram 2500 is the 3/4-ton version of the Dodge Ram 1500 (1/2-ton). It was also available in a 1-ton version. This truck always featured front disc brakes which used brake pads. While it was more common for this truck to feature rear drum brakes, it was also available with rear disc brakes. Disc brakes integrate brake calipers, brake rotors and brake pads. When the brake pedal is depressed, the caliper pistons press the pads against the surface of the rotors to slow and stop the vehicle.

Instructions

    1

    Park your Ram 2500 on a level surface substantial enough for lifting and supporting a 3/4-ton truck. Apply the parking brake if youre replacing the front brake pads but do not apply the parking brake if youre replacing the rear brake pads.

    2

    Place a wheel block against the outside tread of a tire on the opposite axle that youre replacing the brake pads on then loosen the lug nuts on the two wheels of the same axle youre replacing the brake pads on using a lug nut wrench. Do not loosen the nuts more than half a turn.

    3

    Lift the axle youre replacing the brake pads on with a 3/4-ton rated jack and support the axle on two 3/4-ton rated jack stands placed under each front lower control arm or under each side of the rear axle, respectively.

    4

    Remove the lug nuts then the tires.

    5

    Place a pry bar into the caliper pad window against the steel plate of the outboard pad and pry the pad against the rotor until the caliper piston compresses enough to loosen the brake pads and caliper.

    6

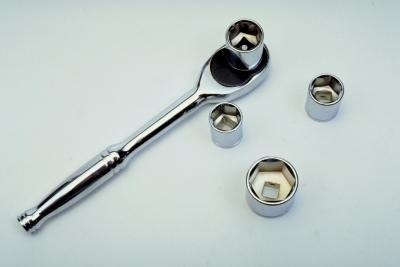
    Remove the upper and lower caliper bolts using a ratchet and a 3/8-inch hex-head socket bit, then remove the caliper from the rotor and knuckle assembly. Rest the caliper on a milk crate or sturdy box so there is no tension on the brake hose attached to the caliper.

    7

    Use the pry bar to unseat one of the outboard pad retaining springs from the caliper housing then pull the remaining spring of the pad off of the caliper.

    8

    Place a caliper piston reset clamp or a large C-clamp onto the face of the inboard pad and the housing of the caliper and tighten the clamp to fully compress the caliper piston into the caliper.

    9

    Remove the clamp then unseat the inboard caliper brake pad retaining clip from the hollow caliper piston. Use the pry bar if necessary.

    10

    Use a wire brush to scrub off the rust, brake dust and other debris on the sliding surfaces of the caliper and the knuckle, then apply a coat of the silicone brake grease onto the respective surfaces.

    11

    Insert the inboard pad and retaining clip into the hollow caliper piston, making sure the steel plate of the pad is flush against the piston. Set one side of the outboard pads retaining spring onto the outer caliper housing then pivot the pad onto the housing to clip the remaining retaining spring.

    12

    Place the caliper and pad assembly onto the rotor and knuckle assembly and hand-thread the caliper bolts into the caliper. Tighten the bolts with the ratchet and 3/8-inch hex-head socket bit. Repeat the brake pad replacement procedure for the other wheel.

    13

    Replace the tires and lug nuts. Tighten the nuts with the lug nut wrench, applying a star formation until the nuts hold the tires firmly onto the wheel hubs.

    14

    Lower the Ram to the ground then tighten the lug nuts, applying the star pattern with the torque wrench set at 135 foot-pounds and a socket.

    15

    Apply the brake pedal several times until it feels firm then check the brake fluid level in the master cylinder. Add brake fluid if necessary. Remove the wheel block, disengage the parking brake (if applicable) then test-drive the truck.

Read More..

Catalytic Converter Hazards!

Government auto emissions control legislation mandates that virtually all cars built or sold in the U.S. come equipped with a catalytic converter. A smart device, catalytic converters help to convert dangerous and polluting exhaust gases into less harmful carbon dioxide and water. As helpful of a device that it is, there are some hazards that come with the use of a catalytic converter. Read on to learn what you need to know about your vehicles catalytic converter.

Many consider a catalytic converter to be a godsend. With pollution levels ever climbing, the U.S. government acted to reduce harmful pollutants in a step to clean up the environment. The Environmental Protection Agency was formed by the Nixon Administration and the agency was instrumental in passing the Clean Air Act to help America control pollution. Since 1975 virtually every passenger vehicle has come equipped with a catalytic converter.

As helpful as catalytic converters can be, they can be problematic. Besides failure, which generally goes unnoticed until your vehicle flunks its next inspection, it is the intense heat of the unit that can cause problems.

If you work on your own vehicle, you need to let your car cool down completely before working near the exhaust system. Catalytic converters get very hot, as hot as 1800 degrees, and any burn sustained from touching a hot converter can be very dangerous, even deadly.

Motorists have also learned that a catalytic converter can be a fire hazard. For the past three decades police and fire department reports have indicated that many car fires have been started because a motorist parked their car over dry leaves. Even when the engine is off the hot converter can drop a spark which can ignite leaves underneath. If that happens, your car can be engulfed in mere minutes and destroyed by the conflagration.

There are also hazards that occur to the catalytic converter itself. Because the unit burns at such hot temperatures, catalytic converters can suffer rapid thermal deactivation. Some experts suggest switching to synthetic engine oil to help reduce phosphorous contaminants a known contributor to failure.

No, you cannot legally remove your catalytic converter as you may become subject to stiff fines and penalties. Yes, if your car was built before 1975, none of these concerns matter to ou so enjoy your classic and let her rip without pollution controls holding you back!

Read More..

Wednesday, April 29, 2015

1AAuto.com Part 2 Replace Change Service Rear Disc Brakes Ford Explorer Mountaineer 1995-02 Video Clips. Duration : 6.78 Mins.


www.1aauto.com 1A Auto shows you how to save yourself some big money. Replace your own rear brakes. In this video we show you how to replace the rear brakes on a 1998 Ford Explorer. This procedure is the same for any 1995-2001 Ford Explorer, 2001-2002 Sport Trac, and 1997-2001 Mercury Mountaineer


Tags: Installation, instructions, tutorial, install, change, replace, worn, squeaky, fading, old, brake, pads, rotors, rear, ford, mercury, explorer, sport, trac, mountaineer, 1995, 1996, 1997, 1998, 1999, 2000, 2001, 2002
Read More..

Power windows are a convenience feature for lots of vehicles on the road today, and when they go out, it can be pretty inconvenient. Time was, replacing a window regulator was a real pain, but on the 1999-2006 Silverado, the process has become a lot easier. Now, the regulator is on a cable system, and can be pulled out of the door in minutes. In this case, the project vehicle is a 2004 Chevrolet Silverado, but the process is similar for other vehicles.

Instructions

    1

    Place the flathead screwdriver between the lock button and the door panel, then twist the screwdriver to pop out the door lock trim. Repeat this process for the trim around the interior pull handle and the power window switch panel. Unplug the power window switch panel, using your hands.

    2

    Unbolt the door panel from the door, using the 1/4-inch ratchet and socket set. The bolts are in the corner near the armrest, and behind the door lock. Then pull off the interior mirror trim piece with your hands.

    3

    Push the door panel up towards the headliner, using your hands, and then pull the door panel off of the door.

    4

    Plug the power window switch back into the harness on the door and roll down the window to the halfway point. There are two clamps on the window channels that hold the window in place. Unbolt them, using the 3/8-inch ratchet and socket, then tilt the back of the window up towards the front of the vehicle and pull the glass out of the door towards the interior, using your hands.

    5

    Unbolt the bolts that secure the window channels to the door, using the 3/8-inch ratchet and socket. Then unbolt the window regulator motor from the door. Unplug the power window regulator motor harness from the door as well. Fold the channels together so that the channels, cables and window regulator motor can fit through the access panel, and pull out the assembly.

    6

    Slide the replacement power window assembly into the door panel and bolt it in place, using the 3/8-inch ratchet and socket. Reinstall the glass in the reverse order of removal, and tighten it down to the regulator, using the 3/8-inch ratchet and socket.

    7

    Plug the wiring harness back into the switch panel and test the windows up and down movement. If it binds in any way, adjust the window, or consider reinstalling the assembly, as the cables may be twisted.

    8

    Reassemble the door panel in the reverse order of disassembly.

Read More..

Im back now

It has already been almost two months my 308 didnt move. Before getting the car back on road, first thing to do is to renew insurance & road tax and do some minor maintenance.

The car is already 26months OTR. This time around Ill insure the car for RM85k only. Based on insurance calculator, the premium will be RM1,501.97 [@38.3% NCD] .....

Some of the items for 308 I bought at eBay to date:
12v 6A car battery charger
Hi-power 1157 DRL LED
Peugeot Ori F/Brakepads [set of 4]
F/Wiper Blades [set of 2]
Peugeot Sport decal
R/Wiper Blade
Splash Guard Clips [10pcs]
Tyre valve caps [set of 4]
Alloy Wheel Center Caps [set of 4]
Brake Piston Reset Tool
Wheel Bolt Caps - 19mm [20pcs].....
.... yes indeed, I need 19mm bolt caps. Now my 308 uses 19mm instead of std 17mm wheel bolts.

Will update this blog in early May 2011. Thanks for visiting.
Read More..

Tuesday, April 28, 2015

New brake line

After absorber removed for servicing purpose, found the brake hose already cracked.


I made a decision to use a custom made hose. Went to a nearby hydraulic shop to made it. It just a straight hydraulic hose with 3000 psi pressure printed on that hose. It also a multi layer hose with steel braided in the middle.

To remove the old hose, I made a mistake by rounded the nut. Then need to removed steel hose to the shop again to replace rounded nut. Unluckily, the original hose cannot be flare. The steel hose broke when try to flared it. Again, new steel hose to replaced that one.


Hopefully, this new setup is worth and last long.

*Unfortunately these type of hose is not suitable for brake line purpose. This hose expend when brake pedal pressed.


posted from Bloggeroid
Read More..

GMC 2500 Rear Disc Brake Removal

The rear disc brakes found on a GMC 2500 truck act as a parking brake as well as do some of the daily braking. Over time, these brakes wear down, and the rotors will need to be removed to either get them turned or for a full replacement. Although its a straightforward task, it is different than removing front brake rotors, as it involves a bit of an extra step.

Instructions

    1

    Make sure the parking brake is off. Lift up the rear axle on the truck using the jack and set the axle on the jack stands so that the wheels are off the ground.

    2

    Unbolt the rear brake caliper from the axle using the 3/8-inch ratchet and socket. Lift it off of the rotor, then suspend it from the frame using the bungee cord, making sure the brake line is still slack.

    3

    Grip the rotor with both hands. Twist the rotor slowly while simultaneously pulling it towards you, until it pops off of the axle.

Read More..
How to Replace the Front Pads on a Chevy Express Van

The Chevy Express was introduced in the late 90s replacing the G-Series full-size vans. It was available in 1/2-ton, 3/4 ton and 1-ton models, such as the G-Series. Although there was an issue with the front brakes wearing out prematurely, no recall was announced by General Motors to solve the problem. Many believe the front braking system (that compensated 75 percent braking capacity for the van) was inadequately suited for the full-size vehicle. Some aftermarket replacement parts may help solve the problem.

Instructions

    1

    Use a clean hand pump to suck 1/3 of the brake fluid from the master cylinder of the Express van prior to replacing the brake pads. This will make room for the brake fluid being purged backwards into the master cylinder once the caliper pistons are retracted.

    2

    Lift and support the Express van with a truck jack and suitable weight truck jack stands. Place the jack stands under the front control arms.

    3

    Remove the front center caps and lug nuts using a breaker bar and socket or suitable pneumatic tool. Remove the front wheels.

    4

    Remove the two caliper guide bolts using the ratchet and a suitable socket. Some model Express vans may call for a 3/8-inch Allen wrench socket.

    5

    Pry the caliper and pad assembly off of the rotor with a pry bar or large slotted screwdriver.

    6

    Hang the caliper to the chassis with some wire so it does not damage the rubber brake hose.

    7

    Use the pry bar or slotted screwdriver to unseat the outboard pad from the caliper housing first and then pull the inboard pad from the caliper piston bore.

    8

    Compress the caliper piston using the 6-inch C-clamp and an old pad to anchor the C-clamp against. This will prevent damage to the caliper piston.

    9

    Apply a coating of brake silicone lubricant to the brake pad tabs mating surface on the caliper anchor hardware clips.

    10

    Inspect the rotor for any visual damage such as rust pits, heat or hard spotting (discoloration on the surface plate of the rotor) or cracks. Replace the rotor if necessary but removal of the caliper anchor will be required to do so.

    11

    Install the new brake pads into the caliper. Start with the inboard pad and seat the retaining clip into the caliper piston bore. Finish with the outboard pad and use the pry bar or slotted screwdriver to get the dual retaining clips onto the outboard housing of the caliper.

    12

    Replace the caliper and pad assembly over the rotor. Apply a light coat of silicone brake lubricant to the non-threaded surface of the caliper bolts and align them with their respective holes. Tighten them with the torque wrench and suitable socket to 45-foot pounds.

    13

    Replace the wheels and lug nuts and torque the lug nuts to 135- to 145-foot pounds with the torque wrench and suitable socket.

    14

    Replace the center caps and then lower the Express van. Re-torque the wheels, if necessary, when the van is on the ground before replacing the center caps.

    15

    Pump the brake pedal several times until it feels firm. This will purge the caliper pistons from the bores and seat the pads in their proper placement. Recheck and add brake fluid to the master cylinder to ensure it is full. Test drive the van for proper braking operation.

Read More..

Monday, April 27, 2015

How to Change the Brake Pads on a 2003 Maxima

How to Change the Brake Pads on a 2003 Maxima

The 2003 Nissan Maxima uses brake pads on both the front and rear brakes. The type of calipers and pads used on the front and rear wheels differs, so the method of changing the brake pads is slightly different depending on which end youre working on. In either case, you need to replace either both the front or rear brake pads together. The pads will likely need changing at around 60,000 to 80,000 miles.

Instructions

Accessing the Brake Pads

    1

    Open the cap on the brake master cylinder reservoir and siphon out two thirds of the fluid with an unused turkey baster or syringe bottle. Make sure you know your local laws for disposing of brake fluid.

    2

    Raise the cars front or rear end, support it on jack stands and remove both wheels. Loosening the lug nuts before raising the car will make the wheels easier to remove. Block the front wheels with wheel chocks if youre raising the rear end, and vice versa.

    3

    Wash off each brake assembly using a aerosol brake cleaner and a drip pan for catching the residue.

Removing the Brake Pads

    4

    Depress the front brake calipers piston into the caliper using a C-clamp. On rear calipers, disconnect the parking brake cables clip and unhook the cable from the parking brake lever.

    5

    Remove the calipers lower bolt and pivot the caliper upward on a front caliper, then squeeze and remove the anti-rattle springs from the brake pads. On a rear caliper, remove the upper bolt and pivot the caliper down.

    6

    Remove the inner and outer brake pads from the caliper mounting bracket. Unclip and remove the shims from the pads.

    7

    Remove, clean and inspect the caliper slide pin. Coat it with high-temperature grease and install the pin back in the mounting bracket.

Installation

    8

    Connect the shims to the replacement brake pads and apply an anti-squeal compound to the backs of the shims in semi-circles around the middle.

    9

    Install the inner and outer brake pads in the bracket; the inner brake pad has the wear indicator. On front brakes, connect the anti-rattle springs to the pads.

    10

    Retract the piston in a rear caliper by turning it clockwise with needle-nose pliers or a special tool from an auto parts store

    11

    Swing the brake caliper back into place, then replace and tighten the mounting bolt.

    12

    Reinstall the wheels and lower the car.

    13

    Fill the brake master cylinder with fresh brake fluid.

Read More..

Peugeot 308 DIY Oil and Oil Filter Change

Not everybody knows exactly where the oil filter cartridge housing is located.

It is actually hidden underneath air intake flexible hose.
03
In order to locate the oil filter cartridge housing the resonator must be removed first (after detaching it from the flexible air hose).
04
After removing the resonator lift up the flexible hose to locate where the oil filter housing is.


Items and tools required for oil and oil filter change.
The oil filter cartridge housing can be removed with 27mm socket wrench. Oil drain plug needs 8mm allen key (not shown).

Fresh oil filter cartridge in its housing.

For those who have never DIY engine oil change please follow step-by-step procedures HERE.

How to reset Service Indicator
After changing the oil and oil filter the service indicator must be reset as fallows...
1. Turn off the ignition
2. Push-and-hold trip-meter reset button.
3. Still pushing the trip-meter reset button turn on the ignition (do not start the engine)
4. On the display will appear count down from 10 to 0
5. After the display read 0 the service indicator (spanner icon) will disappear.
6 Switch off the ignition.
7. Done!
Read More..

Sunday, April 26, 2015

Tips to Help You Car Last Longer

Buying a new car today can be really expensive. Therefore, getting the most out of the car you already have may be your best option. Here are some of the simple tips to help make that possible.

1) Check the manual to find out what type of gasoline is recommended then stick with that type of fuel. Filling your car with regular gas when it calls for premium it can cause your engine to start knocking and this will destroy the engine. Filling your car with premium gasoline when it calls for regular grade you not only waste gas and money but it can cause problems as well.

2) Dont let your gas drop below a quarter-tank if the car has a fuel injection system. When turning corners you can interrupt the flow of fuel causing pump problems.

3) Replace your fuel filter every 10,000 mile or two year which ever comes later. Keeping the fuel clean helps to maintain long engine life.

4) Take it easy and drive smoothly. Flooring the gas to leap ahead and slamming on the breaks to a screeching halt will put wear and tear on the engine, transmission, suspension and brakes.

5) Let your car warm up before taking off and especially before turning on the air conditioner and heat or you will cause unnecessary engine wear.

6) Remember to keep the oil changed. Changing your oil every 3,000 miles or three months whichever comes first.

7) Switching to synthetic oil will offer superior protection for your car. Although it is more expensive it offers longer protection for your car some up to 12,000 miles.

8) Do not use oil additives. They dont reduce the wear on your engine and they dont boost performance.

9) Change your brake fluid every two years or 24,000 miles. If you have anti-lock brake system you should change it once a year.

10) Power steeling fluid should be changed every three years or 30,000 miles whichever comes first.

11) Keep an eye on the anti-freeze. It keeps your car running strong especially in cold weather. It also prevents rust and corrosion. For the best results use 50-50 anti-freeze-water mix using distill water not tap water. Change it every two years or 24,000 miles.

12) Replacing the battery six months before it is due to expire. A weak battery will cause alternator and starter problems.

13) Replace timing belts every 60,000 miles.

14) Turning your air conditioner, your heater and defroster on and running them for a few minutes every two weeks to keep them clog-free.

15) Protection for your car during extreme weather to prevent weather damage. Using a windshield cover to help protect the dashboard and prevent weather damage. Use silicone spray a couple times a year to help protect the weather stripping and rubber surfaces.

Read More..

How to Change Front Brake Pads on a Mazda MPV

The Mazda Multi-Purpose Vehicle, or MPV, was a minivan manufactured with a hydraulic caliper and pad front brake design, which occasionally requires maintenance. The twin pads on either side will wear down their friction material, and they should be replaced in unison. The average backyard mechanic can replace the pads for one brake in about 30 minutes.

Instructions

    1

    Raise the MPV onto the jack stands with the floor jack, placing each stand onto the frame rails. Do not place the stands onto the engine mounts or suspension parts.

    2

    Remove the front wheels by turning the lug nuts in a counterclockwise direction. Set the wheels aside, away from the van.

    3

    Remove the caliper by turning the rear caliper mount bolts in a counterclockwise direction, then sliding the caliper off the rotor.

    4

    Pull the pads from the caliper pistons and replace them with fresh units. The pads are not secured to the caliper pistons, and the new pads should just be pressed into position.

    5

    Slide the caliper and pads back onto the rotor, then secure the rear caliper mount bolts by turning them in a clockwise direction.

    6

    Repeat steps 3 through 5 for the opposite sides brake.

    7

    Replace the wheels by turning their lug nuts in a clockwise direction, in an alternating pattern.

    8

    Lower the van from the jack stands with the floor jack.

Read More..

How to Install Rear Glass on a 1968 Mustang

If the rear glass on your 1968 Mustang becomes damaged, it can not only reduce visibility when looking out of your back window, but also put your vehicle at risk of being stolen. Replacing your rear window is a relatively simple process which will take between one and two hours to complete. You can buy the replacement glass, parts and the tools you will need for the job from your local auto parts store.

Instructions

    1

    Use a sharp blade to remove the weatherstripping trim from around the edge of the Mustang rear window. Make an initial slit in the bottom of the trim and work your way around the edge cutting away the rest of the trim. Discard the trim in the trash.

    2

    Carefully press the rear windshield away from the frame of your Mustang. Wear work gloves to protect your hands from broken glass. Have someone stand outside the vehicle to help you lift the windshield from the frame.

    3

    Use a cloth to wipe away all of the excess caulk left on the frame of the window. Install new weatherstripping into the window frame.

    4

    Apply a layer of windshield urethane caulk around the edge of the new glass panel using a caulk gun. Lift the windshield into the weatherstripping and frame. Press the edges against the frame so that a seal sets in place.

    5

    Wait a few hours to allow the seal to firmly set in place. Clean the rear window glass with a cloth to ensure full visibility.

Read More..

Saturday, April 25, 2015

Thanks God! Peugeot is a French Car

Can someone imagine "WHAT IF" Peugeot 308 THP is a Japanese car? Probably on the back or around the car one will find stickers, badges and emblems of any combination of the following letters/words...

1.6E . DOHC . 16v . VVT . Multi-Point Pgm FI . Twin-Scroll Turbo Intercooler . 4AT Adaptive . Tiptronic . ABS . EBD . ESP . ASR . DSC . 6 AirBags . Dual-Zone Digital Climate Control . Car of the Year . International Engine of the Year. bla...bla...bla...

Thanks God! Apart from the word "PEUGEOT" and the lion emblems there is only one sweet and simple looking badge, "308". Dalam pada itu pun nampak sangat tidak kena pada tempatnya apabila Nasim tampal "NAZA" dan "Turbo" berhampiran dengan "308" badge - looks too crowded there.

I think 99% of the owners have already removed or relocated them. Ive relocated the "Turbo" badge on to the grille just in front of the intercooler.


|Home|Fuel Consumption|Performance|uncles DIY|Car Size Comparison|
Read More..

How to Replace Front Brake Pads on a 2006 Civic

Honda has sold the Civic since the 1973 model year. For the first 11 years of its lifespan, the Civic was only known as an economical car with plenty of room. In 1985, Honda used the Si badge for the first time on the Civic; the lucky recipient was the Civic CRX. The 1985 CRX Si model produced the most power ever (90 horsepower) by a Civic. The 2006 model year Civic had three engines as available options, all of which had a displacement of 1.6 liters. Replacing the front brake pads yourself on a 2006 Civic can save you money.

Instructions

    1

    Remove fluid from the brake master cylinder with a turkey baster until it is only half-full. Transfer this fluid to a small container. Leave the lid off the master cylinder.

    2

    Loosen the front lug nuts, but dont remove them. Raise the front of the Civic with a floor jack. Position jack stands under the subframe and lower the Civic until only the jack stands support its weight. Remove the lug nuts and pull the wheels off the vehicle.

    3

    Place an 8-inch C-clamp on the brake caliper. Position the screw part of the clamp to touch the outer brake pad and the fixed part to touch the rear of the caliper. Tighten the C-clamp until the clamp no longer tightens -- this compresses the caliper piston. Remove the C-clamp.

    4

    Remove the two bolts on the rear of the caliper, using a ratchet and socket. Pull the caliper from the caliper bracket and hang it from a nearby suspension component, using a bungee strap.

    5

    Pull the brake pads from the caliper bracket. Remove the two bolts at the rear of the caliper bracket with a ratchet and socket. Pull the caliper bracket from the vehicle.

    6

    Loosen the two screws in the center of the rotor, using a Phillips screwdriver. If the screws do not come out easily, tap the head of each screw with a ball-peen hammer to free them. Pull the rotor from the vehicle. If the rotor is stuck to the vehicle, tap the rotor with a rubber mallet to free it.

    7

    Close the micrometer jaws and press the "Reset" button to calibrate it. Measure the thickness of the disc part of the rotor in four places with the micrometer. Make note of the thinnest measurement.

    8

    Check the rotor for any defects, like: hot spots, gouging or mirror-like shine. If these imperfections exist, resurface or replace the rotor. Have the rotor resurfaced by a professional if its thinnest measurement is 0.750 inches or thicker. If the rotor is thinner than 0.750 inches, replace the rotor.

    9

    Replace the rotor, no matter its condition, if it measures thinner than the discard specification stamped on the middle of the rotor. If the rotor is above the discard specification and no defects exist, leave it as is.

    10

    Install the new, resurfaced or original rotor on the Civic. Tighten the two screws with a Phillips screwdriver.

    11

    Clean the metal shims on the caliper bracket with a wire brush. Reinstall the caliper bracket on the Civic and tighten the bolts to 81 foot-pounds with a torque wrench and socket.

    12

    Apply a thin coat of disc brake grease to the metal shims in the caliper bracket and the rear of the new pads. Slide the pads into the caliper bracket.

    13

    Place the caliper over the brake pads and tighten the caliper bolts to 36 foot-pounds with a torque wrench and socket.

    14

    Repeat Steps 3 through 13 for the other side of the Civic.

    15

    Reinstall the front wheels on the Civic and hand-tighten the lug nuts. Raise the Honda from the jack stands with a floor jack and remove the jack stands. Lower the Civic to the ground. Tighten the lug nuts, in a crisscross pattern, to 80 foot-pounds with a torque wrench and socket.

    16

    Press and release the brake pedal until the pedal feels firm when pressed. This extends the caliper piston back out to the brake pads.

    17

    Check the fluid in the brake master cylinder and add new DOT 3 brake fluid until the level reaches the "Max" line on the reservoir. Close the reservoir lid.

    18

    Take the old brake fluid in the small container to a used automotive fluid recycling center. Many auto parts stores perform this task free of charge.

Read More..

New Peugeot 308 GT

The NEW Peugeot 308 GT will be launched in winter 2014, according to company insiders.


The 308 GT is likely to use the 1.6-litre turbo engine from the 208 GTi - produces 197bhp and 275Nm of torque and should take the 308 from 0-100km/hr in less than 7.5 seconds and a top speed of not less than 225km/hr.


The diesel version will also be available and set to be a tuned version of the new 2.0-litre BlueHDi engine with around 185bhp and 400Nm of torque.

Hot hatch fans will have to wait for next year for a full-blown 308 GTi. That car - which could in fact be called the 308 R, after 2013s concept car (as shown below) - will be developed by the new Peugeot Sport division, which is responsible for the widely praised RCZ R

Read More..

Friday, April 24, 2015

How to avoid saman E k0q

Traffic speedtrap/red_light cameras can be tricky and very annoying. They dont prevent infractions and sometimes are misleading and you end up being charged hundreds if not thousand of ringgit for driving only a couple of km over the unreasonable SLOW speed limit such as 70km/hr around school zone at NIGHT where there is no school children around! 75% of the saman E-k0qs I got are around 70km/hr zone between midnight and 5am while driving around Bentong and Raub on my monthly trips to Kelantan.

Fortunately there are several ways to protect ourselves from kena saman E-koq. These product are proven overseas to be effective. Please be advised that the thing may have legal restrictions here in Malaysia. Use on your own risk.

Special formula cover incorporates a thin diffusional lens designed to protect you from unjust saman E-k0q is now avaialble. The design claims to be effective, inconspicuous, and successful against all types of traffic cameras.


We buy 308 Turbo on purpose
Right, no? No matter how safe-driving style we practice sooner or later we will receive a reminder letter or two in white envelope. If u dont, accept it or not 308Turbo is not for you. You are buying the wrong car for the right reason. Period.

If youve been "shot", youve been got! But fortunately there is a thing now available designed to diffuse the infrared laser beam.

How do laser guns work?
Laser guns work by emitting a laser beam which is bounced off a flat, reflective surface on your vehicle. Your registration no. plate is the preferred area of the vehicle that a laser is pointed against by the enforcement authority. Most conventional laser detectors are ineffective. Even if you do detect the beam, its too late. Youre caught!

How does the thing work?
This specially designed cover works to absorb and diffuse the incoming laser beam. This significantly shortens the effective distance of laser guns.
Avoid a costly saman E-k0q!
Read More..

Orga Calculator

Orga-Calculator  tells WHEN and WHERE your Peugeot was assembled.

Production locations
81 = Poissy France
82 = Villaverde Spain
83 = Ryton UK
85 = Vesoul France
87 = Eiv Poissy France
88 = Mulhouse France
89 = Sochaux France
U5 = Pininfarina Italy
U8 = Sevel Italy
U9 = Sevel nord France
UT = Kolin Czech
CA = Aulnay France
CJ = Rennes France
FV = Vigo Spain
G8 = Creil France
G9 = Gennevilliers France
RE = Rennes France

Click on the button below and calculate the production date of your Peugeot.


For instance for AHW308...

... was assembled @ Sochaux France (code#89) on October 7th 2008 (code#11656). Mmmh.. almost 6yrs old already and is it now overdue to look for another peugeot ? 
Read More..

4AGE Air Flow Meter Pinout


Read More..

Thursday, April 23, 2015

How to Remove the Rear Sliding Glass Window on a Dodge Dakota

Replacing the sliding rear window on a Dodge Dakota pickup starts with removal of the old glass. The window sits in a rubber gasket that seals to the window frame as well as on the opening in the truck cab. Removing the window with the gasket is the only way to get the gasket out in one piece, saving it for reuse later. The window will come out with very little effort and in about 10 minutes, but be careful that you do not pop it out of the cab so quickly that it falls and gets broken.

Instructions

    1

    Slide the seat in your Dakota as far forward as possible, then fold the seat back forward. Climb into the truck behind the seat and locate the retaining screws in the trim around the rear window of your truck.

    2

    Remove the screws from the trim panels with a Phillips screwdriver, then pop the panels off and set them aside. Locate the rubber gasket that runs around the perimeter of the rear window.

    3

    Pull down the corner of the rubber gasket and insert a flat screwdriver between the gasket and the truck body to hold the gasket down. Move about two inches over and pull the gasket down again. Insert another flat screwdriver.

    4

    Continue pulling the gasket away from the body, working your way along the top of the window. Push slightly on the window as you work until you can slide the top and sides out of the truck body.

    5

    Grasp the top of the window from the outside of the cab; pull up and out, separating the window, frame, and gasket from the cab of the truck. Set the window and gasket somewhere safe.

Read More..

How to Remove Pitting From a Windshield

How to Remove Pitting From a Windshield

The cars windshield takes a lot of punishment from road debris as the car is used. Pitting can be the result of road debris such as dirt and small rocks hitting the cars windshield. Even using a damaged windshield wiper of the car can also cause pitting. If you cannot feel the pitting on the windshield with your fingernail, then a glass polishing kit is the solution your windshield needs.

Instructions

    1

    Park the car in a shaded area away from direct sunlight.

    2

    Clean the cars windshield using the glass cleaner and microfiber cloth.

    3

    Get inside the car and mark the outline of the windshields pitting with the crayon or the masking tape.

    4

    Mix water and the polishing compound in the mixing pan. Read the glass polishing kits instructions on the proper water and polishing compound mixture.

    5

    Insert the felt bob included in the glass polishing kit to the electric drill. Wear safety goggles before proceeding to the next steps.

    6

    Dip the flat side of the bob to the water and polishing compound solution. Position the electric drill so that the flat side of the glass polishing kits bob is on top of the pitting on the windshield.

    7

    Turn on the electric drill and work the polishing compound solution up and down across the windshields pitting. Stop and spray the work area with water to ensure the polishing compound solution is always wet and to prevent heat buildup on the windshield. Continue to work the polishing compound solution on the windshields pitting, stopping and spraying the work area at regular intervals.

    8

    Turn off the electric drill. Clean the work area on the windshield with water and wipe dry with the microfiber cloth.

Read More..

How to Remove the Windshield Without Breaking It

How to Remove the Windshield Without Breaking It

Usually you would only remove your vehicles windshield if it were broken beyond repair. Taking your car to an auto center for a windshield repair can be costly, so consider doing this on our own. The help of a friend may be needed at the end, but you can do the dirty work yourself with all the right supplies. Only a few are needed.

Instructions

    1

    Lay the towel on top of the windshield, and be prepared to slip it under the stainless trim once it is lifted.

    2

    Place the trim removal tool underneath the stainless trim, pull upward slightly, and then quickly slip the edge of the towel underneath it. Doing this prevents scratches on the glass.

    3

    Pull the removal tool downward as it catches on the clips that hold the windshield in place. The clips will release, and that strip of trim will come loose. Continue doing this around the entire windshield frame until all trim is removed.

    4

    Cut the butyl window seal that is in place along the outside rim of the windshield. Slide the knife underneath the seal to remove it. The only thing exposed at this point will be the metal frame.

    5

    Remove the windshield completely. Place the cold knife blade at a 90 degree angle between the windshield and its metal frame. Turn the handle to begin separating the windshield from the frame, and then force the knife through the butyl material using the T-handle.

    6

    Get inside of the car and push the windshield outward. If you have another person working with you, have them grab the windshield as you push it outward so it does not hit the ground and shatter.

Read More..

Wednesday, April 22, 2015

www.acurabrookfield.com SOLD -Take a look at this pre-owned 2005 Acura TL, Stock: 12059. Visit our website for more information on this vehicle and our full inventory. Acura Milwaukee 19180 W Bluemound Road Milwaukee Acura Dealer WI, 53045 (800) 639-2287 Our story began over 43 years ago with a philosophy of "Loving Care Service" and that approach has helped the Zimbrick family of automotive retail centers to grow to 14 franchises with a selection of over 2000 quality vehicles. We are proud of the great staff that we have the privilege of working with. Their commitment to excellence is a major reason we have developed such a loyal client base our customers become our friends. We are also pleased to support many important community activities. We appreciate the opportunity to provide you with the best automotive ownership experience possible. Youll find that exceeding your expectations is our standard practice. Thats what "Loving Care Service" is about. Offering: 2010 Acura TSX - Tech/V-6 2009 Acura MDX Tech/ Entertainment/Sport Pkg 2009 Acura RDX - Tech 2009 Acura RL Tech/Tech & CMBS - ACC 2009 Acura TL - SH-AWD/Tech 2009 Acura TSX - 5-Speed Automatic/6-Speed Manual, 5-Speed Automatic/Tech 2004-2009 Certified Acura www.acurabrookfield.com www.acurabrookfield.com Serving Milwaukee, Brookfield, Waukesha and the surrounding areas faithfully! ONE OWNER - SOLD AND SERVICED HERE - EXTENSIVE This Acura Certified vehicle has undergone an extensive ...

Read More..

BELIEVE it or NOT!

Mechanics at SC always want to do additional work by adding additive fluids, performing flushes, etc. Do they really work?

gambar hiasan


Aftermarket Engine Oil Additives
According to the manufacturers of these additives, their products are supposed to lubricate parts of the engine and improve fuel economy/performance, restoring worn engine, increasing engine life, quietening the engine, clean build-up off of the components... bla, bla, bla... (blawok, blawok, blako) !!!

However, there is little independent research that supports the effectiveness of additives. The fact is they are totally useless and in many cases actually detrimental or damaging to the engine and even void car warranty.

According to lubricant experts, oil additives are the modern version of snake oil sales that misled consumers into believing that their products offer increased engine protection and performance when added to the oil.

Aftermarket Fuel Additives
Fuel we buy,  is already properly blended with the necessary additives. Fuel producers had spent million if not billion of ringgit on R&D for the best formulation. 

Adding any other fluid to the existing fuel may disturb the delicate balance that the refineries have deliberately worked to establish. It’s basic but complex chemistry - establishing all of the necessary characteristics for optimum combustion. There is no magical elixir that is designed to make your engine magically become more efficient and powerful.

I hope no one is insane enough too - to add vitamin-like tablets into his car fuel tank! 

ATF Additives
Again the answer is NO. Transmission oil recommended by the car manufacturer is essential and will give  fantastic service all on it’s own. No help required from the aftermarket vendor!

Other Additives...
The same is applied for other additive fluids for the radiator, for non-MFbattery and for brake fluid. The only "additive" that you can use is that blue liquid for the wiper washer tank...

Read also "3 Additives Your Car Doesnt Need"


Read More..

Tuesday, April 21, 2015

How to Replace Disc Brakes on a GMC Suburban

How to Replace Disc Brakes on a GMC Suburban

The GMC Suburban has been around since the 1940s, and is known today as a versatile vehicle capable of carrying lots of people to their destination. It also is fairly heavy, so the disc brakes go through more work than on a traditional vehicle. and need to be replaced and cared for more often. In this case, the project vehicle is a 1998 GMC Suburban, but the process is similar for other vehicles as well.

Instructions

    1

    Lift up the front of the vehicle using the jack and secure it on jack stands. Make sure the vehicle is completely secure on the jack stands before you crawl underneath it. Remove the front wheels using the tire iron and place them to the side, out of the workspace.

    2

    Unbolt the brake caliper from the spindle using a 3/8-inch ratchet and socket. Hand the brake caliper from the frame using a metal hook to keep the brake line free of any supporting weight. Use the flathead screwdriver to pop off the bearing cap on the center of the brake rotor, then unbolt the rotor from the spindle using an open-end wrench. Slide the rotor off the spindle and place it to the side.

    3

    Place the replacement rotor face down on the ground. Place a handful of bearing grease in your hand and work the grease into the replacement wheel bearing. Place the bearing into the center of the back of the rotor, then tap the replacement wheel seal onto the rotor using the mallet. Flip over the rotor and grease the front wheel bearing in the same manner as the rear, then place it into the rotor. Slide the rotor onto the spindle and tighten the bolt onto the spindle, securing the rotor with an open-end wrench. Once its tightened all the way, back off the nut 1/4 rotation, and spin the rotor to make sure it rotates freely. Tap the bearing cap onto the rotor using the mallet.

    4

    Place the C-clamp into the center of the brake caliper, then tighten it down on the pistons. Two circular pistons are on the center of the caliper, and the C-clamp must be tightened to clamp them down all the way. Place the clips from the replacement brake pads onto the pads, then clip them into the caliper. Slide the caliper onto the rotor and bolt it in place on the spindle using the 3/8-inch ratchet and socket.

    5

    Reinstall the front wheels using the tire iron and then raise the vehicle off of the jack stands using the jack and place it back on the ground.

Read More..

How to Put Brake Pads on a 2001 Ford Escape

How to Put Brake Pads on a 2001 Ford Escape

The brake pads on a 2001 Ford Escape are designed like most other disk brake systems: once the material wears down to the backing plate, it will begin to squeal and will require replacement. The Ford Escape has four-wheel disk brakes, with an anti-locking mechanism to avoid lockup and loss of control. The average backyard mechanic can change all four sets of brake pads and bleed the lines in about an hour and a half.

Instructions

    1

    Jack up the Escape and remove the wheel of the brake pads to be changed. Place the vehicle on a jack stand and set the jack and wheel aside.

    2

    Unbolt and remove the caliper by turning the two rear bolts in a counterclockwise direction. The caliper will slide off of the rotor, and the pads will come out by hand as they are not secured. The caliper should be bound with the C-clamp or vice grips so that it does not expand.

    3

    Replace the pads by setting them into the caliper, then placing the caliper back into position on the rotor. The clamp will get in the way, so remove it a second or two before placing the caliper. Get the caliper on the rotor quickly, or it will expand too far and require force to push back in.

    4

    Secure the caliper by turning the rear bolts clockwise.

    5

    Release the bleeding nipple on the rear of the caliper by turning it counterclockwise. Brake fluid will leak out slowly. Pop the cap on the master cylinder and pour in brake fluid while pressing on the brake pedal. With the nipple open, fluid will drain out and will be continually replaced by the new fluid in the master cylinder. When there is no air in the lines, and the fluid coming out looks clean, twist the nipple in a clockwise direction to close the line. Fill the master cylinder to the full line and replace the cap. The brake line to that caliper is now "bled."

    6

    Apply a quick burst of anti-squeal spray to the back of the pad--never the front--through the holes in the caliper for this purpose. The spray is a light adhesive with graphite, and will hold the pads to the caliper to prevent dust from making noise.

    7

    Replace the wheel and lower the Escape down from the jack stands.

    8

    Repeat the procedure for the remaining brake pads.

Read More..

4AGE20V oil filter relocate

Lama giler tak update blog ni... Kali ni aku nak tunjuk DIY Oil Filter Relocation Kit installation. Kete aku ni nak kene relocate oil filter pasal lepas gi tukar aftermarket nye extractor, salah 1 piping tu rapat sangat dengan oil filter. Sepatutnye nak kene pasal oil cooler sekali, tapi sebabkan bajet, relocate jer la dulu.
Ni dah siap pasang
Gambar oil filter dengan stock extractor
Ni gambar close up pipe extractor dengan oil cooler adapter. Still rapat lagi.
Aku letak oil filter kat area washer tank. Washer tank dah takder, pecah. Oil filter relocate kit aku beli kat mudah.my. Hos ngan fitting aku gi buat kat kedai hidraulik
Read More..

Monday, April 20, 2015

Replacing the glass on a 98 Dodge caravan at a car repair shop can be quite expensive. Prices can range from $250 to over $350. This does not even include the cost of window tinting or any other service. If you have the knowledge and time, it is much cheaper to remove the glass yourself. Removing the glass usually takes one to two hours and is quite simple once you get the hang of it.

Instructions

    1

    Remove the windshield wiper from the back window on your 98 Dodge Caravan. Unclip the wiper blade and set aside. Find a socket that fits on the bolt that holds the bottom of the wiper arm to the window. Unscrew the wipers nut and pull it out. Set aside. Rock the wiper arm back and forth until it loosens from the window. Pull the wiper off and set it aside as well.

    2

    Get inside the van and locate the plastic molding and plastic clips that hold the window in place. These will be located along the top, bottom and sides of the back window. Keep the clips remain intact, as they will be needed to hold in the replacement window. Remove the window molding hiding the edges of the glass.

    3

    Remove the window clips gently. It may be necessary to use a razor to cut away the sealant holding the clips to the glass. Go very slowly, as it is very easy to shatter the glass during this step.

    4

    Get outside the car and approach the window from the back. Use a razor blade and push it in between the glass and the pinchweld. The pinchweld is the groove that the glass rests in. Cut the urethane sealant slowly using a sawing motion. Cut all the way around the edges of the glass. This can take anywhere from 15 minutes to a little over an hour. Dont to rush this step as the glass can shatter easily from too much pressure from the sawing motion. However, it is impossible to cut the urethane without sawing as it is an extremely tough material. It may be necessary to go back inside the car and cut some of the urethane from the inside as well, using an extended razor handle.

    5

    Tap gently on the glass to remove it from the casing. Since the 98 Dodge caravan is so large, you will need the help of a friend to guide the glass safely. Lay out several blankets and pillows in case you lose hold of the glass. Put the glass in a safe location.

    6

    Clean the pinchweld to prepare it for the new glass. You can vacuum it out or dust it out with old rags. You may need to use a damp cloth to clean out the dirtier areas. The area is now ready for the new glass.

Read More..

Sunday, April 19, 2015

RayGun Technology Brake Rotor

RayGun Technology make the best motorcycle brake rotors ever created for Harley Davidson and soon, other types of motorcycles as well. RayGun Technology guarantees the surface finish of their rotors for the life of your motorcycle when used with their brake pads. A proprietary Atomic-Forging process creates unprecedented levels of hardness and wear resistance keeps chrome looking like chrome, with no flaking, scuffing or wear.

Read More..

How to Replace the Rear Glass on a Jeep Wrangler

How to Replace the Rear Glass on a Jeep Wrangler

You can replace the rear liftgate on your Jeep Wrangler in a few steps. If the rear glass is broken, removal may be as simple as pulling the hinges off the hard top and transferring them to the new glass. If the glass is intact, you must transfer the wiper motor, hinges and ball studs from the old glass to the new glass. The glass is durable, so breaking it is not a concern unless you drop it or over-tighten the components as you transfer them. You can get a replacement liftgate from a salvage yard, glass company or Jeep dealership.

Instructions

    1

    Remove the wiring harness connectors from the rear defroster and the rear wiper motor from inside the Jeep. Both connectors pull off by hand; leave them hanging for now.

    2

    Open the liftgate glass and tailgate of the Jeep. Remove the support pistons from the glass. You will see a clip on each end of the support where it meets the ball stud. Remove the clips with a flat-head screwdriver, and pull the pistons off.

    3

    Remove the four bolts that attach the liftgate hinges to the hardtop, using a socket and ratchet. Remove the glass from the Jeep, and set it somewhere soft and flat to transfer the hardware from it to the new glass.

    4

    Remove the rear wiper arm from the wiper motor by removing the nut securing the arm to the wiper motor with a socket and ratchet. Slide the arm straight off the motor and set it aside.

    5

    Remove the large nut on the wiper motor shaft with a wrench. The wiper motor shaft runs through the glass. Slide the motor off the glass and remove the two rubber grommets from the inside and outside of the glass. Place the grommets in the hole on the new glass and slide the wiper motor shaft into the hole. Replace the retaining nut and tighten it with a wrench until it is snug.

    6

    Transfer the hinges from the old glass to the new glass. Remove the nuts from the hinges, move the hinges over and reinstall the nut. Torque them to 62 inch-pounds with a torque wrench.

    7

    Remove the ball studs, using a socket and ratchet, and transfer them to the new glass. Tighten them to 112 inch-pounds with a torque wrench.

    8

    Install the glass on the hardtop by installing the four mounting bolts through the hinges and into the top. Tighten the bolts to 95 inch-pounds with a torque wrench.

    9

    Reinstall the support rods, sliding them onto the ball studs on the body and glass, then install the retaining clips. The clips just push into position and will snap in when fully seated.

    10

    Reconnect the wiring harness connectors for the wiper motor and the rear window defroster. They both just push onto the connectors of the respective parts. Close the tailgate and liftgate, then install the wiper arm back onto the wiper motor shaft. Install the retaining nut and tighten with a socket and ratchet.

Read More..

How to Replace the Rear Brakes on a 2000 Focus

How to Replace the Rear Brakes on a 2000 Focus

The 2000 Ford Focus uses a specially designed brake drum on the rear brakes, with the drum bolted in place over the brake assembly. The brake shoes used on the rear brakes are built for this type of brake drum, so make sure you have the correct type when replacing the shoes. The brake shoes are similar to others, however, in that they are held in place with multiple springs and levers, making disassembly and replacement a complex process.

Instructions

Accessing the Brake Shoes

    1

    Block the cars front wheels with heavy blocks or wheel chocks, raise the cars rear end with the floor jack, support it onto jack stands and remove the rear wheels. If the car uses anti-lock brakes, disconnect the ABS wiring connector from the brake assembly.

    2

    Unscrew and remove the brake drum and hub assembly with a wrench; the four bolts are located at the rear of the assembly.

    3

    Clean the brake assembly behind the drum with an aerosol brake cleaner. Place a tray or drip pan under the assembly and wait for the assembly to dry.

Removing the Brake Shoes

    4

    Depress the ends of the shoes hold-down springs with pliers and withdraw them from the pins.

    5

    Disconnect the top ends of the brake shoes from the wheel cylinder and pull their bottom ends off the bottom anchor. Wrap an elastic band over the wheel cylinder pistons to keep them from ejecting.

    6

    Disengage the parking brake cable spring away from the operating lever on the rear shoe using pliers, then unhook the cable from the lever to completely remove the brake shoes.

    7

    Push the shoes bottom ends together and unhook the lower return spring from them, taking note of the holes the spring is in. Pull the front shoe away from the strut and the brake shoe adjuster and unhook the upper spring.

    8

    Pull the adjustment strut off the rear brake shoe, then remove the struts support spring.

Installing the Brake Shoes

    9

    Apply a small amount of high-temperature brake grease to the points on the cylinder backing plate where the brake shoes come in contact.

    10

    Hook the support spring onto the replacement rear brake shoe and connect the adjustment strut to the shoe. Hook both the lower and upper return springs to both of the brake shoes to connect the shoes together.

    11

    Connect the parking brake cable spring on the backing plate to the operating lever on the rear brake shoe--you may need the pliers again. Place the bottom end of the shoe assembly on the backing plates bottom anchor, remove the elastic band connect the top ends to the upper cylinder.

    12

    Fasten the hold-down springs to the brake shoes, using the pliers to press the springs ends onto the pins.

    13

    Reinstall the brake drum and apply the bolts in the rear. Reconnect the ABS wiring connector if equipped.

    14

    Reconnect the wheels on both sides of the car and lower it off the jack stands after changing the brakes for both wheels.

Read More..

Saturday, April 18, 2015

How to Repack Grease & Adjust Wheel Bearing in Cars : How to Remove Brake Calipers on Cars Video Clips. Duration : 2.87 Mins.


Learn how to remove the brake calipers on a car in order to adjust the wheel bearings on acar with expert automotive tips in this free online auto repair and car maintenance video clip. Expert: Nathan McCullough Bio: Nathan McCullough graduated from Nashville Auto-Diesel College with a GPA of 3.5 and received their Craftsmanship Award and Honor Seal. Filmmaker: Robert Rogers


Tags: repairing car tips, repacking car grease, wheel bearing tips, adjusting car bearings, adjusting car tips, auto tips, car tips
Read More..

The Pontiac Bonneville has either disc or drum brakes in the rear of the car. Both types of brakes provide adequate stopping power for a passenger car. Replacing the rear disc brakes on a Bonneville is a simple procedure to perform. Read further to learn how.

Instructions

Removal of the Old Disc Brakes

    1

    Verify that the brake fluid is less than half full. If necessary, siphon some of the brake fluid from the reservoir with a syringe or suction gun. Empty it into an approved container and dispose of it according to your local regulations.

    2

    Raise the rear of the Bonneville off the ground with a car jack. Support it on all sides with jack stands to prevent tipping. Keep children and animals away from the vehicle while servicing it.

    3

    Loosen the lug nuts of the wheel and tire assembly with a torque wrench. Remove the assemblies and set aside face up to prevent damage to them.

    4

    Compress the caliper piston into the bore with a large C-clamp to make room for the brake caliper to pivot off its bracket. Be sure you do not compress it more than one millimeter of piston travel.

    5

    Unscrew the parking brake cable guide pin bolt from the lower control arm. Take out the bottom brake caliper pin bolt and rotate the caliper upwards. Hang the caliper from the frame of the Bonneville with mechanical wire to prevent breaking the brake hose.

    6

    Slide out the inboard and outboard brake pads. Inspect the brake pad retainers and replace if damage is apparent.

Installation of the New Disc Brakes

    7

    Verify that the brake caliper suspension boots, pin bolts and piston boot are free of damage. If you see visible damage or corrosion, replace them.

    8

    Turn the piston clockwise with a spanner wrench until it retreats into the bore. Align the notches in the piston with the alignment pins on the new brake pads.

    9

    Lubricate the rear brake caliper bolts with a high temperature lubricant. Fasten the brake pad retainers to the brake caliper bracket, followed by the inboard and outboard brake pads.

    10

    Release the caliper from the mechanical wire and place it in the caliper bracket over the brake pads. Replace the brake caliper pin bolt and torque to 20 foot/pounds.

    11

    Insert the parking brake guide bolt in the lower arm and torque to 18 ft. lb. Replace the wheel assembly and lower the Bonneville to the ground.

    12

    Pump the brake pedal 2/3 of the way down to seat the pistons and brake pads. Replace any brake fluid that was lost.

Read More..
How to Replace a Truck Ball Joint : How to Remove a Caliper on Trucks Video Clips. Duration : 2.07 Mins.


Learn how to properly remove your caliper in thisfree auto repair and car maintenance video clip. Expert: Nathan McCullough Bio: Nathan McCullough graduated from Nashville Auto-Diesel College with a GPA of 3.5 and received their Craftsmanship Award and Honor Seal. Filmmaker: Robert Rogers


Tags: repair, maintenance, ball, auto, car, joint, mechanic
Read More..

Friday, April 17, 2015

How To Retrieve Trip Log from Garmin 2575R

  1. Connect the GPS set to a pc/laptop using provided USB cable
  2. Turn on the GPS then select "Mass storage mode"

  3. Open mapping application such as Mapsource from the pc/laptop then click "Receive from Device" icon. When Dialogue box appears select the right device from the pull-down list.
  4. Select "Tracks" under "what to receive" and then click "Receive". When "Transfer complete" dialogue box appears click OK. Done.
  5. List of track logs can be found under "Tracks" tab. Double click on any "Active log" from the list to view "Track Properties" where you can retrieve trip data such as date, time, speed, altitude, latitude, longitude, ...etc.
  6. If you click "show profile" you will see the vertical profile for the entire track.
Read More..

How to Remove Brake Rotors From an Isuzu Rodeo

How to Remove Brake Rotors From an Isuzu Rodeo

The brake rotors on your Isuzu Rodeo may wear too thin, crack or get scored after years of service. Being one of the most important safety components on your vehicle, a worn-out or damaged rotor should be replaced as soon as possible. It is a job you can do yourself using some simple tools and these steps.

Instructions

Remove the Brake Caliper

    1

    Park your Isuzu in a safe place with a level surface, if possible.

    2

    Loosen the wheel lugs using a lug wrench on the wheel assembly with the brake rotor you want to replace.

    3

    Raise the wheel assembly and tire off the floor using a floor jack.
    Support the vehicle on a jack stand.
    Remove the tire.

    4

    Set a C-clamp over the brake caliper and turn in the C-clamp screw to push the brake caliper cylinder into its bore.

    5

    Remove the two brake caliper mounting bolts, using a wrench or ratchet and socket and lift the caliper off the brake rotor.

    6

    Secure the brake caliper on the vehicle body using a piece of wire to avoid damage to the brake hose connected to the caliper.

    7

    Remove the two caliper bracket mounting bolts, if your Isuzu model is equipped with it. Then lift the caliper bracket off the rotor.

Replace the Rotor

    8

    Remove the brake rotor by pulling the unit off the wheel assembly by hand. If the rotor seems stuck, tap the rotor lightly around the friction surface, using a rubber mallet to pop it out from the wheel assembly.

    9

    Wipe the hub and wheel assembly clean of brake lining dust using brake parts cleaner and a shop rag.
    Remove the protective film off the new rotor surface using denatured alcohol and a clean rag.

    10

    Install the new rotor on the hub and wheel assembly.

    11

    Install the brake caliper mounting bracket if your Isuzu model is equipped with one.
    Install the brake caliper.

    12

    Install the tire and wheel lugs.

    13

    Lower the vehicle.
    Finish tightening the wheel lugs.

    14

    Add brake fluid to the brake master cylinder.
    Depress the brake pedal several times to adjust the brake pads over the new rotor.

Read More..

Thursday, April 16, 2015

How to Replace Brakes Brake Pads and Rotors

How to Replace Brakes - Brake Pads and Rotors Tube. Duration : 2.17 Mins.


To view the next video in this series click: www.monkeysee.com


Tags: Brake, pads, Rotors, wheel, Tire, Hub, Caliper, Disc, Brakes, Bleed, Piston, truck, Car, Maintence
Read More..

Car Door Window Installation

Car-Door Window Installation

To install a car-door window, you will have to remove the door panel and its equipment to get to the door window. Although every door panel and window is different in style and position, there are some basic commonalities. Once you remove the parts needed to get to the inner part of your door panel, installing a door window is quite simple. Its important to make sure that you have your repair manual handy before getting started.

Instructions

    1

    Remove the inner door panel. Remove the door handle and other inner parts by removing screws using your Phillips screwdriver. Pry the inner door panel away from the door using a door panel remover, a screwdriver or your hand. Make sure that you dont break any clips holding the panel to the door. When removing the door, you may see some wires attached to the door panel and door. Simply unsnap the wires from the door panel.

    2

    Remove the weather barrier from the door by working around the edges underneath. Use a box cutter to work around the edges. Do not remove the weather barrier completely. When you feel like its lifted enough, tape it back. Since every car door is a little different, you will need to refer to your repair manual. Place the door handle back on so that you can see the two bolts that you need to remove. Remove those bolts using your ratchet tool.

    3

    Place the doors glass inside the window from the outside of the door in a slanted position. Engage the window into the track by pushing forward gently. Make sure the window is lined up with the inside channels on the inside of the window. Once you have the window in, line the glass bolt holes with the bolt holes where you took them off. Screw the bolts back in using your ratchet tool. If you need to remove a glass window, lift the glass up and out into a slanted position, removing the glass on the outside of the door.

    4

    Roll your window up and down to see if its working property. Replace the weather barrier, the door panel and the other door equipment. Once you do this, youre done.

Read More..

DIY Tips for Mechanical Drum Brakes

DIY Tips for Mechanical Drum Brakes

Mechanical drum brakes are a common alternative to disc brakes on many cars, trucks and SUVs. Drum brakes are typically found on the rear wheels, especially on older vehicles. They operate differently from disc brakes, but drivers can still inspect and even service drum brakes by following a few simple tips.

Removing the Drum

    Removing the drum from the brake assembly can be one of the most difficult and frustrating parts of servicing drum brakes. To make this task easier, spray the bolt that secures the drum, along with the exposed lugs and any other exposed hardware, with a lubricant such as WD-40. Wait for the lubricant to dissolve some of the rust around the drum, making it easier to remove. Spraying the other hardware will make those pieces easier to remove as well when the time comes. If the drum is still stubborn, use a rubber mallet to break up the rusty seal all the way around the rim of the drum. This can also help loosen a drum that is rusted in place. Once the drum is off, you can clean it with a lubricant to remove rust and make it easier to replace at the end of the repair or to remove in the future.

Checking Shoes

    Even if you arent planning to replace the drum brakes shoes, any time that the drum is off is a good time to inspect them. Check to ensure that the surfaces of both shoes inside each brake are smooth and clean. Some drum brake shoes come with warning strips that will show through when there is very little material left. Make sure that the indicator strip, or the rivets in the case of riveted shoes, doesnt show. Also check the inside of the drum for smoothness and warping, which can occur due to excessive heat and interfere with braking performance.

Disassembly

    A drum brake includes many small springs and other parts, so disassemble the brake with care. If you dont have access to a service manual with clear photographs or diagrams of the brake assembly, you will want to create your own diagram. Indicate the order in which you remove the parts since reassembly will be done in the opposite sequence. To actually disassemble the brake, use vise grips to grasp the retainer springs. To loosen the brake lines, use a flare wrench rather than an open-end wrench.

Keeping Clean

    Brake jobs are notoriously messy work. Gloves are the only real way to keep your hands clean, but they may hinder the precision work involved in servicing drum brakes. To keep your garage floor clean, place a pan beneath the brake. This will catch any rust or brake dust, along with brake fluid should you discover a leak in the brake line or a blown wheel cylinder. Take special care when handling brake fluid, which can easily damage auto paint.

Read More..